How to Install Home Surveillance
Setting up a home surveillance system involves several essential steps:
- Define your goals and requirements.
- Choose the right equipment.
- Install and configure the system components.
These steps are crucial for ensuring your surveillance system meets your needs. Let’s break them down.
Step 1: Define Your Goals
For home surveillance, common objectives include:
- Monitoring indoor areas or the perimeter of your home.
- Preventing unauthorized access to your property.
- Recording activity for future review.
Clearly outlining your goals will help you determine the type and number of cameras required, as well as their placement and additional features like motion detection or night vision.
Step 2: Choose the Right Equipment
Analog vs. IP Cameras
While IP cameras are gaining popularity, analog systems (e.g., AHD) often suffice for homes with fewer cameras. Analog systems are:
- Affordable. They cost less than IP systems.
- Simple to install. Especially with coaxial cables.
- Reliable. They work independently of the internet.
Indoor and Perimeter Monitoring
For monitoring within and near your home, analog systems using coaxial cables are ideal. If you need perimeter surveillance, pay attention to:
- Camera placement for full coverage.
- Power supply options for outdoor cameras.
Equipment Checklist
- Cameras. Choose based on resolution (e.g., 2MP for 1080p) and coverage area.
- Recorder. DVRs are suitable for analog systems, while NVRs are used with IP cameras.
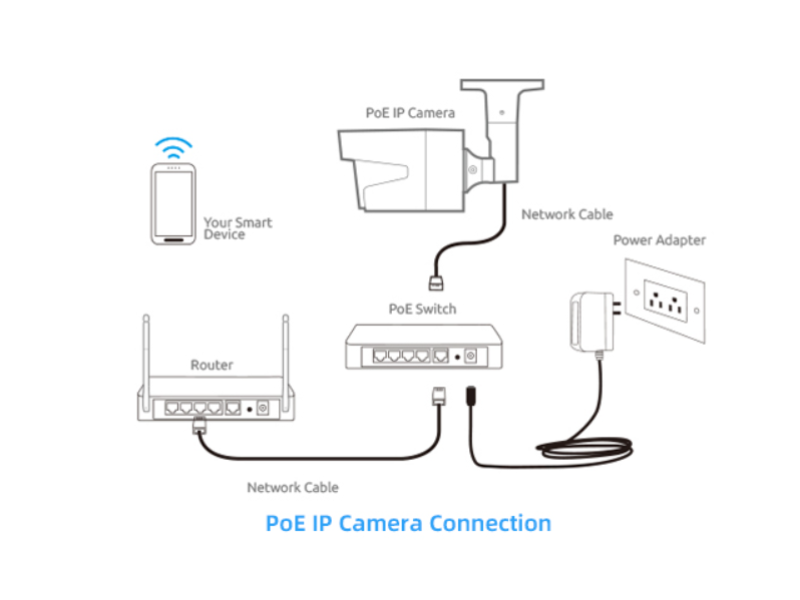
- Cables and connectors. Coaxial for analog or Ethernet for IP.
- Power supply. Ensure sufficient capacity for all devices.
For convenience, you can purchase a ready-to-install surveillance kit, but verify that the included components meet your needs.
Step 3: Installation
Autonomous Systems
A standalone system without internet access is the simplest to install. It typically includes:
- Cameras wired to a DVR or NVR.
- A monitor for local viewing.
Internet-Connected Surveillance
For remote access, you’ll need an internet connection. Considerations include:
- Wired internet. Best for transmitting high-quality video from multiple cameras.
- Wireless options. Suitable for one or two cameras, but bandwidth may be limited.
If your home lacks wired internet, alternatives include IP cameras with built-in 3G/4G modems and cloud services. Be mindful of ongoing costs for data plans and subscriptions.
Surveillance Through the Internet
For remote monitoring, connect your surveillance system to the internet. Options include:
- Single camera setup. Use a cloud service to monitor one camera for general oversight.
- Full system integration. Connect multiple cameras to a recorder linked to a router.
Pro Tip: Pair an autonomous system with one internet-enabled camera for cost-effective remote monitoring.
Additional Tips for Installation
- Plan your layout. Use a map to identify camera placement for optimal coverage.
- Avoid blind spots. Ensure every camera is within the field of view of another camera.
- Protect outdoor equipment. Use weatherproof and vandal-resistant cameras.
- Test your system. Confirm all cameras are operational before completing the installation.
Conclusion
Installing a home surveillance system is achievable with careful planning and the right tools.
- Opt for analog systems for simplicity and cost savings.
- Use IP systems for advanced features like remote access.
- Combine autonomous and internet-enabled solutions for comprehensive coverage.
With a well-designed setup, you’ll enjoy peace of mind knowing your home is secure.