Office Ceiling Lighting Fixtures
Organizing lighting in office spaces is a critical task that significantly impacts productivity, employee well-being, and the overall aesthetic of the workplace. The primary requirement is to ensure adequate illumination of workstations in compliance with existing sanitary standards. Effective office lighting can be achieved through general, localized, or combined lighting systems, each serving distinct purposes to create a conducive working environment.
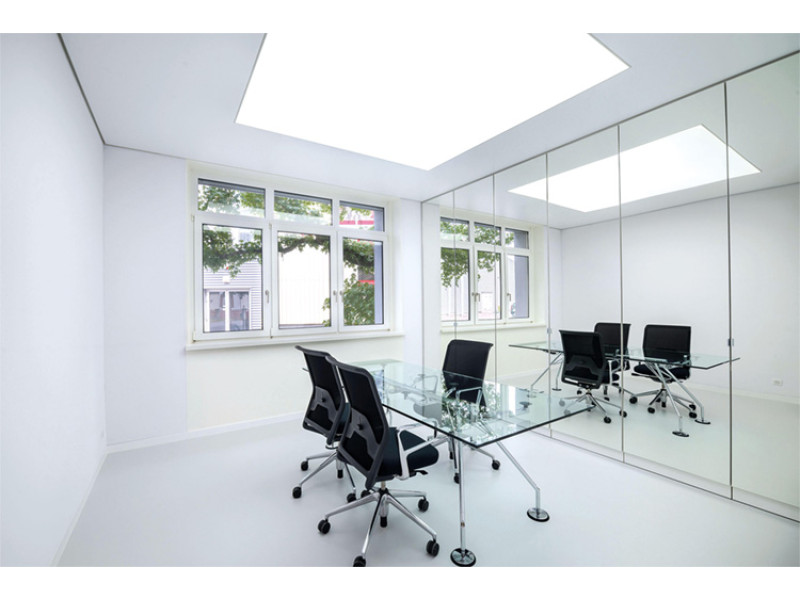
Ceiling-mounted lighting fixtures offer numerous advantages, including minimal shadow creation, uniform light distribution, and reduced eye strain compared to other lighting placements. This guide explores the various types of office ceiling lighting fixtures, focusing on LED and fluorescent options, their installation processes, bulb selection criteria, and best practices to optimize lighting in your office.
1. Types of Office Ceiling Lighting Fixtures
Office ceiling lighting fixtures come in various designs and functionalities, each suited to different installation methods and lighting requirements. The primary classifications are based on the type of light source and the mounting method.
1.1. Mounting Method: Recessed, Surface-Mounted, and Pendant Fixtures
1.1.1. Recessed (Inbuilt) Fixtures
Description:
Recessed fixtures are integrated into the ceiling structure, providing a sleek and unobtrusive lighting solution. They are ideal for offices with drop ceilings or those seeking a clean, modern look.
Features:
Flush Installation:
The fixture sits flush with the ceiling, minimizing visual clutter.Adjustable Components:
Many recessed fixtures allow for directional lighting, enabling focus on specific areas.Power Supply:
Connected via the office’s electrical system, often controlled by centralized switches.
Advantages:
Aesthetic Appeal:
Offers a seamless and professional look suitable for contemporary office designs.Space Efficiency:
Maximizes ceiling space, allowing for higher ceiling heights without bulky fixtures.Uniform Lighting:
Ensures even distribution of light across the workspace, reducing shadows.
Disadvantages:
Installation Complexity:
Requires precise installation within ceiling cavities, often necessitating professional assistance.Maintenance Challenges:
Accessing recessed fixtures for cleaning or bulb replacement can be more difficult compared to surface-mounted options.
Example Models:
- Philips Recessed LED Panel:
Features energy-efficient LED technology with adjustable brightness settings and a slim profile for modern offices.
1.1.2. Surface-Mounted Fixtures
Description:
Surface-mounted fixtures are attached directly to the ceiling surface without recessing. They are versatile and suitable for various office ceiling types, including traditional plaster or drop ceilings.
Features:
Visible Design:
The fixture remains visible, contributing to the office’s interior design.Variety of Styles:
Available in numerous designs, from minimalist to decorative, catering to different aesthetic preferences.Ease of Installation:
Generally easier to install than recessed fixtures, requiring fewer ceiling modifications.
Advantages:
Design Flexibility:
Enhances the office’s decor by adding stylish lighting elements.Accessibility:
Easier to access for maintenance, cleaning, and bulb replacement.Cost-Effective:
Typically less expensive to install compared to recessed fixtures.
Disadvantages:
Space Consumption:
Can occupy ceiling space, potentially making rooms appear lower or more cluttered.Shadow Creation:
May create more shadows compared to recessed fixtures if not properly positioned.
Example Models:
- GE Surface-Mounted LED Downlight:
Combines energy-efficient LED lighting with a modern design, suitable for various office environments.
1.1.3. Pendant Fixtures
Description:
Pendant fixtures hang from the ceiling and are often used as statement pieces or for task lighting in specific areas like conference rooms or workstations.
Features:
Suspended Design:
Hang at varying heights, adding visual interest and focal points.Directional Lighting:
Can be adjusted to provide focused illumination where needed.Variety of Styles:
Available in diverse designs, from industrial to elegant, to match office decor.
Advantages:
Aesthetic Enhancement:
Acts as a decorative element, enhancing the office’s visual appeal.Focused Lighting:
Ideal for highlighting specific areas, such as meeting tables or individual workstations.Customization:
Adjustable heights and angles allow for personalized lighting solutions.
Disadvantages:
Installation Complexity:
Requires secure mounting and may involve more intricate electrical work.Space Constraints:
Pendant fixtures may not be suitable for low-ceiling offices or open-plan spaces with limited overhead clearance.
Example Models:
- Artemide Pendant LED Light:
Features an adjustable arm for targeted lighting and a sleek, modern design suitable for contemporary offices.
1.2. Light Source Type: LED vs. Fluorescent Fixtures
1.2.1. LED Fixtures
Description:
LED (Light Emitting Diode) fixtures are the most modern and energy-efficient lighting option available. They are rapidly replacing traditional lighting sources in office environments due to their superior performance and cost-effectiveness over time.
Advantages:
High Energy Efficiency:
LEDs consume significantly less power compared to fluorescent and incandescent bulbs, leading to lower energy bills.Long Lifespan:
LEDs can last up to 50,000 hours or more, reducing the frequency of replacements and maintenance costs.Low Heat Emission:
Generates minimal heat, enhancing safety and comfort within the office environment.Versatility:
Available in various color temperatures and can be integrated with smart lighting systems for customizable illumination.Environmental Friendly:
LEDs do not contain hazardous materials like mercury, making them safer for the environment.
Disadvantages:
Higher Initial Cost:
The upfront investment for LED fixtures is higher compared to fluorescent options, though the long-term savings offset this expense.Compatibility Issues:
Some older fixtures may require modifications or replacements to accommodate LED technology.
Key Features for Selection:
Lumens (Brightness):
Determine the appropriate brightness level based on the office size and lighting requirements.Color Temperature:
Choose between warm white (2700-3000K) for a cozy atmosphere, neutral white (3500-4500K) for general office use, or cool white (5000K) for a bright, energetic environment.Dimmability:
Select dimmable LEDs if adjustable lighting levels are desired for different tasks or times of day.
Example Models:
- Philips LED Office Panel:
Offers high luminosity, adjustable color temperatures, and integrates seamlessly with modern office designs.
1.2.2. Fluorescent Fixtures
Description:
Fluorescent fixtures have been a staple in office lighting for decades due to their relatively high energy efficiency compared to incandescent bulbs. However, their popularity is waning in favor of LED technology.
Advantages:
Moderate Energy Efficiency:
More efficient than incandescent lighting, providing adequate illumination for office spaces.Cost-Effective Initial Investment:
Generally less expensive to purchase upfront compared to LED fixtures.Variety of Designs:
Available in various shapes and sizes to fit different office layouts and design aesthetics.
Disadvantages:
Shorter Lifespan:
Fluorescent bulbs typically last around 10,000 hours, necessitating more frequent replacements than LEDs.Contains Hazardous Materials:
Fluorescent bulbs contain mercury, requiring careful handling and disposal to prevent environmental contamination.Flickering and Noise:
Can produce flickering and humming noises, which may be distracting and contribute to eye strain.Less Flexible:
Limited color temperature options compared to LEDs, making it harder to customize the lighting environment.
Key Features for Selection:
Lumens (Brightness):
Ensure the fixture provides sufficient brightness for the office tasks and space.Color Temperature:
Typically available in cooler color temperatures suitable for work environments.Energy Star Certification:
Look for Energy Star-rated fluorescent fixtures to ensure higher energy efficiency and performance standards.
Example Models:
- GE Fluorescent Office Panel:
Provides consistent illumination with energy-efficient performance, suitable for various office layouts.
2. Installation of Office Ceiling Lighting Fixtures
Proper installation of office ceiling lighting fixtures is crucial to ensure optimal performance, safety, and aesthetic appeal. This section outlines the essential steps and considerations for installing LED and fluorescent fixtures effectively.
2.1. Pre-Installation Planning
Steps:
Lighting Design:
Develop a comprehensive lighting plan that outlines the placement and type of fixtures based on the office layout and functional zones.Assess Ceiling Structure:
Determine the type of ceiling (e.g., drop ceiling, solid ceiling) to select compatible fixtures and identify mounting requirements.Measure and Mark:
Use a measuring tape and marker to indicate the exact spots where the fixtures will be installed, ensuring alignment with the office structure.
2.2. Creating Installation Holes
Description:
Spot lighting fixtures are installed in pre-drilled holes within the ceiling. Precision in drilling is crucial to ensure a seamless fit and secure mounting.
Steps:
Select Drill and Hole Saw:
Use an electric drill with a hole saw attachment of the appropriate diameter for the fixture.Drill Holes:
Carefully drill holes at the marked locations, ensuring they do not penetrate structural elements or electrical wiring.Smooth Edges:
Use sandpaper or a file to smooth out any rough edges around the drilled holes for a clean installation.
2.3. Installing LED Fixtures
Steps:
Prepare the Fixture:
Assemble any mounting brackets or plates included with the fixture according to the manufacturer's instructions.Attach to Ceiling:
Secure the LED fixture to the ceiling using screws or anchors, ensuring it is firmly in place.Connect Wiring:
If not pre-wired, connect the fixture's electrical components to the existing wiring, adhering to safety standards.Secure Fixture:
Insert the LED panel or fixture into the mounting bracket or plate, ensuring it is properly aligned and secured.Adjust Light Direction:
For adjustable fixtures, pivot or swivel the light head to direct light as desired.
2.4. Installing Fluorescent Fixtures
Steps:
Prepare the Fixture:
Assemble any mounting brackets or components as per the manufacturer's guidelines.Attach to Ceiling:
Mount the fluorescent fixture to the ceiling using appropriate hardware, ensuring stability and alignment.Install Ballast:
Fluorescent fixtures require a ballast for proper operation. Install the ballast according to the manufacturer’s instructions.Connect Wiring:
Connect the fixture’s wiring to the office’s electrical system, ensuring secure and insulated connections.Insert Bulbs:
Carefully insert the fluorescent tubes into the fixture, ensuring they are securely seated.Test Lighting:
Turn on the power and verify that the fixture operates correctly, providing the desired illumination.
2.5. Securing and Finalizing Installation
Steps:
Install Bulbs:
Insert the appropriate bulb type into the fixture, ensuring a secure fit.Attach Decorative Covers:
If the fixture includes decorative covers or diffusers, attach them according to the manufacturer's instructions.Test Lighting:
Turn on the power and test each fixture to ensure it functions correctly and provides the desired illumination.
3. Connection of Office Ceiling Lighting Fixtures
Proper electrical connections are paramount for the safe and efficient operation of office ceiling lighting fixtures. This section outlines the essential steps and considerations for connecting these fixtures to the power supply.
3.1. Electrical Wiring Standards
Considerations:
Compliance:
Ensure all electrical work complies with local building codes and safety standards.Safety Measures:
Utilize appropriate protective devices such as fuses, circuit breakers, and Ground Fault Circuit Interrupters (GFCIs) to prevent electrical hazards.Wire Gauge Selection:
Choose the correct wire gauge based on the total load and fixture type to ensure safe and efficient power distribution.
3.2. Connecting to Power Supply
Steps:
Turn Off Power:
Always switch off the power at the main electrical panel before beginning any wiring work.Prepare Wiring:
Strip the insulation from the ends of the wires to expose the conductors.Make Connections:
Connect the fixture's wires to the corresponding supply wires using wire nuts or terminal blocks, ensuring secure and insulated connections.Secure Connections:
Use electrical tape or heat-shrink tubing to insulate exposed wire connections and prevent short circuits.Mounting Plate Integration:
For recessed fixtures, connect the fixture's wiring to the mounting plate's electrical connections as per the manufacturer's instructions.
3.3. Low-Voltage vs. High-Voltage Systems
Description:
Office ceiling lighting systems can operate on standard mains voltage (220V) or low voltage (12V), each requiring different connection methods.
Low-Voltage Systems:
Transformer Installation:
Use a step-down transformer to convert 220V to 12V, which is then connected to the fixtures.Wiring Considerations:
Low-voltage systems require thicker wires to handle higher current at lower voltage, potentially necessitating specialized connectors.
High-Voltage Systems:
Direct Connection:
Fixtures are connected directly to the mains power supply, eliminating the need for transformers.Wiring Simplicity:
Typically involves standard electrical connectors and wiring practices.
Advantages of Low-Voltage Systems:
Safety:
Reduced risk of electrical shock.Flexibility:
Easier to integrate with smart lighting systems and dimmers.
Disadvantages of Low-Voltage Systems:
Complexity:
Requires additional components like transformers.Wire Sizing:
Higher current necessitates thicker wires, increasing installation complexity.
3.4. Special Considerations for LED Fixtures
Steps:
Use Compatible Fixtures:
Ensure the fixtures are designed for LED bulbs to prevent compatibility issues.Driver Integration:
For recessed fixtures, ensure that LED drivers (power supplies) are correctly integrated and connected.Heat Management:
Install fixtures with adequate heat dissipation features to prolong LED lifespan.
Advantages:
Energy Efficiency:
LEDs consume less power, reducing overall energy costs.Longevity:
Extended operational life minimizes maintenance and replacement efforts.
Disadvantages:
Initial Cost:
Higher upfront investment compared to traditional bulbs.Compatibility Issues:
Older fixtures may require modifications to support LED technology.
4. Bulb Selection Criteria for Office Ceiling Lighting Fixtures
Choosing the right bulb type is crucial for achieving the desired lighting effects, energy efficiency, and longevity. This section outlines the key factors to consider when selecting bulbs for office ceiling lighting fixtures.
4.1. Energy Efficiency
Description:
Opt for bulbs that offer high luminous efficacy (lumens per watt) to maximize brightness while minimizing energy consumption.
Recommendations:
LED Bulbs:
The most energy-efficient option, providing high brightness with low power usage.Fluorescent Bulbs:
More efficient than incandescent bulbs but less so than LEDs.
4.2. Brightness (Lumens)
Description:
Select bulbs based on the required light output for specific office areas and tasks.
Recommendations:
General Lighting:
Use bulbs with higher lumens (e.g., 3000 lm) for overall office illumination.Task Lighting:
Use bulbs with focused brightness (e.g., 1000 lm) for specific tasks like computer work or meetings.Accent Lighting:
Use lower lumens (e.g., 500 lm) to highlight architectural features or decorative elements.
4.3. Color Temperature (Kelvin)
Description:
Choose bulbs that emit the appropriate color temperature to set the desired ambiance and functionality.
Recommendations:
Warm White (2700-3000K):
Creates a cozy and inviting atmosphere, suitable for break areas or reception.Neutral White (3500-4500K):
Ideal for general office areas, providing balanced and comfortable illumination.Cool White (5000K and above):
Provides a bright, crisp light, enhancing alertness and productivity, ideal for workstations and meeting rooms.
4.4. Lifespan and Maintenance
Description:
Consider the operational lifespan of the bulb to reduce maintenance and replacement frequency.
Recommendations:
LED Bulbs:
Offer the longest lifespan (up to 50,000 hours), minimizing maintenance efforts.Fluorescent Bulbs:
Have a moderate lifespan (up to 10,000 hours), requiring more frequent replacements.
4.5. Dimmability and Control
Description:
Choose bulbs that are compatible with dimming systems and offer adjustable brightness levels for enhanced control.
Recommendations:
Dimmable LEDs:
Provide flexible lighting options and energy savings.Non-Dimmable Bulbs:
Ensure compatibility with fixed lighting systems to prevent flickering or damage.
4.6. Compatibility with Fixtures
Description:
Ensure that the selected bulb type is compatible with the fixture's design and electrical specifications.
Recommendations:
Base Type:
Match the bulb base (e.g., GU10, E26) with the fixture's socket.Voltage Requirements:
Select bulbs that operate within the fixture's voltage specifications (12V or 220V).
5. Applications of Office Ceiling Lighting Fixtures
Office ceiling lighting systems are integral to creating an efficient and comfortable working environment. They can be effectively utilized in various office areas to enhance both functionality and aesthetic appeal.
5.1. General Office Areas
Description:
General office areas require uniform lighting to ensure all workspaces are adequately illuminated.
Benefits:
Consistent Illumination:
Prevents dark spots and ensures even lighting across the entire office.Productivity Enhancement:
Proper lighting reduces eye strain and fatigue, promoting better focus and productivity.Aesthetic Cohesion:
Creates a harmonious and professional appearance throughout the office space.
5.2. Conference Rooms and Meeting Areas
Description:
Conference rooms and meeting areas benefit from focused and adjustable lighting to accommodate various activities.
Benefits:
Task Lighting:
Provides sufficient illumination for presentations, reading, and writing.Adjustable Lighting:
Allows for dimming or brightening based on the meeting requirements.Professional Appearance:
Enhances the visual appeal of meeting spaces, fostering a conducive environment for collaboration.
5.3. Break Rooms and Common Areas
Description:
Break rooms and common areas require comfortable and inviting lighting to create a relaxing atmosphere.
Benefits:
Warm Lighting:
Promotes relaxation and comfort during breaks.Energy Efficiency:
Reduces operational costs in areas with intermittent lighting use.Aesthetic Appeal:
Enhances the overall design of communal spaces, making them more welcoming.
5.4. Reception Areas
Description:
Reception areas are the first point of contact for visitors, making lighting crucial for creating a positive first impression.
Benefits:
Highlight Architectural Features:
Accentuates design elements and branding through strategic lighting.Welcoming Atmosphere:
Creates a warm and inviting environment for visitors and clients.Enhanced Visibility:
Ensures clear visibility for receptionists and security personnel.
5.5. Private Offices and Cubicles
Description:
Private offices and cubicles require focused and adjustable lighting to cater to individual work preferences and tasks.
Benefits:
Personalized Lighting:
Allows employees to adjust lighting to their comfort levels.Reduced Glare:
Prevents eye strain by minimizing glare on screens and work surfaces.Privacy Enhancement:
Proper lighting can contribute to a sense of privacy and concentration.
5.6. Storage and Utility Areas
Description:
Storage and utility areas benefit from practical and efficient lighting to ensure safety and functionality.
Benefits:
Bright Illumination:
Ensures clear visibility for organizing and accessing stored items.Durability:
Utilizes fixtures that withstand environmental conditions and frequent use.Energy Savings:
Reduces energy consumption in areas with minimal lighting needs.
6. Installation and Connection of Office Ceiling Lighting Fixtures
Proper installation and connection of office ceiling lighting fixtures are crucial for ensuring optimal performance, safety, and longevity. This section outlines the key steps and considerations for installing and connecting LED and fluorescent fixtures in office environments.
6.1. Planning and Design
Description:
Before commencing installation, thorough planning and design are essential to determine the optimal layout and functionality of the lighting system.
Steps:
Assess Lighting Needs:
Evaluate the office layout, ceiling height, and existing infrastructure to determine the best placement and type of fixtures.Develop a Lighting Plan:
Create a lighting scheme that balances general and task lighting, ensuring fixtures complement the office design without causing light pollution or glare.Determine Fixture Layout:
Decide on the number and placement of fixtures to ensure even light distribution and highlight specific areas as needed.
6.2. Creating Installation Holes
Description:
Spot lighting fixtures are installed in pre-drilled holes within the ceiling. Precision in drilling is crucial to ensure a seamless fit and secure mounting.
Steps:
Select Drill and Hole Saw:
Use an electric drill with a hole saw attachment of the appropriate diameter for the fixture.Drill Holes:
Carefully drill holes at the marked locations, ensuring they do not penetrate structural elements or electrical wiring.Smooth Edges:
Use sandpaper or a file to smooth out any rough edges around the drilled holes for a clean installation.
6.3. Installing LED Fixtures
Steps:
Prepare the Fixture:
Assemble any mounting brackets or plates included with the fixture according to the manufacturer's instructions.Attach to Ceiling:
Secure the LED fixture to the ceiling using screws or anchors, ensuring it is firmly in place.Connect Wiring:
If not pre-wired, connect the fixture's electrical components to the existing wiring, adhering to safety standards.Secure Fixture:
Insert the LED panel or fixture into the mounting bracket or plate, ensuring it is properly aligned and secured.Adjust Light Direction:
For adjustable fixtures, pivot or swivel the light head to direct light as desired.
6.4. Installing Fluorescent Fixtures
Steps:
Prepare the Fixture:
Assemble any mounting brackets or components as per the manufacturer's guidelines.Attach to Ceiling:
Mount the fluorescent fixture to the ceiling using appropriate hardware, ensuring stability and alignment.Install Ballast:
Fluorescent fixtures require a ballast for proper operation. Install the ballast according to the manufacturer’s instructions.Connect Wiring:
Connect the fixture’s wiring to the office’s electrical system, ensuring secure and insulated connections.Insert Bulbs:
Carefully insert the fluorescent tubes into the fixture, ensuring they are securely seated.Test Lighting:
Turn on the power and verify that the fixture operates correctly, providing the desired illumination.
6.5. Securing and Finalizing Installation
Steps:
Install Bulbs:
Insert the appropriate bulb type into the fixture, ensuring a secure fit.Attach Decorative Covers:
If the fixture includes decorative covers or diffusers, attach them according to the manufacturer's instructions.Test Lighting:
Turn on the power and test each fixture to ensure it functions correctly and provides the desired illumination.
7. Best Practices for Installing and Using Office Ceiling Lighting Fixtures
Implementing office ceiling lighting systems effectively requires adherence to best practices that maximize safety, energy efficiency, and aesthetic appeal while ensuring compliance with regulatory standards.
7.1. Quality Fixture and System Selection
Steps:
Choose Reputable Brands:
Opt for fixtures and systems from trusted manufacturers known for quality and reliability, such as Philips, Osram, GE, Arte Lamp, and STK.Select Appropriate Materials:
Ensure fixtures and systems are made from durable, high-quality materials suitable for the office environment.Opt for Energy-Efficient LEDs:
Select LED fixtures with high luminous efficacy to maximize brightness while minimizing energy consumption.
7.2. Professional Installation
Steps:
Engage Certified Electricians:
Hire qualified professionals to handle the installation, ensuring compliance with electrical codes and safety standards.Ensure Secure Mounting:
Verify that fixtures are securely mounted to prevent sagging or detachment, which could compromise safety and light distribution.Follow Manufacturer Instructions:
Adhere to the installation guidelines provided by the fixture and system manufacturers to ensure proper setup and functionality.
7.3. Smart Integration and Control
Steps:
Incorporate Smart Controls:
Integrate ceiling lighting with smart home or office systems for enhanced control, automation, and customization of lighting scenarios.Use Dimmers and Sensors:
Install dimmers to adjust light intensity and sensors (such as motion or daylight sensors) to optimize energy usage and convenience.Centralized Management:
Implement centralized lighting management systems to control multiple fixtures simultaneously, enhancing efficiency and user experience.
7.4. Regular Maintenance and Monitoring
Steps:
Conduct Routine Inspections:
Regularly inspect fixtures and systems for signs of wear, damage, or malfunction, and address any issues promptly.Clean Fixtures and Systems:
Keep fixtures and systems free from dust, dirt, and debris to maintain optimal performance and appearance.Monitor Energy Consumption:
Track energy usage to identify opportunities for further efficiency improvements and ensure the system operates within desired parameters.
7.5. Aesthetic Considerations
Steps:
Align with Interior Design:
Choose fixture designs and finishes that complement the overall office style, whether it's classic, minimalist, high-tech, Art Deco, or modern.Balance Functionality and Style:
Ensure that the lighting system provides adequate illumination while enhancing the overall aesthetic of the workspace.Utilize Creative Fixture Arrangements:
Experiment with different fixture placements and orientations to create dynamic and visually appealing lighting effects.
7.6. Compliance with Regulations
Steps:
Adhere to Electrical Codes:
Ensure all installations comply with local electrical codes and safety standards to prevent hazards and ensure reliable operation.Use Certified Products:
Select fixtures and components that are certified by recognized standards organizations (e.g., UL, CE) to guarantee quality and safety.Obtain Necessary Permits:
Secure any required permits or approvals before commencing installation to avoid legal issues and ensure compliance.
7.7. Environmental Considerations
Steps:
Sustainable Practices:
Opt for eco-friendly materials and energy-efficient fixtures to minimize environmental impact and promote sustainability.Recycling and Disposal:
Properly recycle and dispose of bulbs and fixture components to reduce environmental pollution and comply with regulations.
8. Conclusion
Office ceiling lighting fixtures play a pivotal role in creating an efficient, comfortable, and aesthetically pleasing work environment. By understanding the various types of fixtures, particularly LED and fluorescent options, their key characteristics, and adhering to best installation and maintenance practices, office managers and facility planners can ensure optimal lighting that enhances productivity and well-being.
Key Takeaways:
Understand Fixture Types:
Differentiate between recessed, surface-mounted, and pendant fixtures to choose the most suitable option based on ceiling type and design preferences.Strategic Fixture Placement:
Ensure comprehensive coverage and focus on key areas to eliminate dark spots and enhance illumination.Select Appropriate Bulb Types:
Opt for LED fixtures for superior energy efficiency, longevity, and flexibility in design.Ensure Proper Installation:
Engage certified electricians for installation to guarantee compliance with safety standards and optimal system performance.Integrate Smart Controls:
Utilize smart office systems and lighting controls like dimmers and sensors to enhance energy efficiency and user convenience.Regular Maintenance:
Conduct routine inspections and cleaning to maintain system integrity, prevent failures, and extend the lifespan of lighting components.Prioritize Energy Efficiency:
Opt for high-efficiency LED fixtures and incorporate energy-saving features to minimize energy consumption and operational costs.Consider Durability and Quality:
Invest in high-quality materials and reputable brands to ensure long-term performance and reliability of your office lighting system.Aesthetic Harmony:
Balance functionality with design by selecting fixtures and layouts that complement your office's overall décor and ambiance.Compliance with Regulations:
Adhere to local electrical codes and standards to ensure safe and legally compliant installations.
By meticulously planning and implementing office ceiling lighting fixtures, businesses can significantly enhance the safety, efficiency, and appeal of their workspaces, fostering productive and inviting environments tailored to their specific needs.
For expert assistance in selecting and installing the right office ceiling lighting fixtures, ensuring compliance with safety standards, or accessing comprehensive project documentation, visit safsale.com. Our specialists are ready to help you create a reliable, efficient, and aesthetically pleasing lighting environment tailored to your specific needs.
Important Notice on Standards
All referenced documents and standards in this guide are provided for informational purposes only and should not be used as official publications. For authoritative guidelines and legal requirements, always consult the official standards organizations or regulatory bodies.