Electrical Wiring in a Residential Home – Installation, Types, and Cable Selection
Electrical wiring is an essential part of any residential building, ensuring reliable power delivery to appliances and lighting. It consists of wires, cables, mounting hardware, and protective devices that form a safe and efficient system. This guide will help you navigate the process of home wiring, including choosing the right materials and understanding the different installation methods.
Types of Electrical Wiring in Homes
Home electrical wiring can be classified into two main categories:
- Outdoor Wiring: Installed outside the building.
- Indoor Wiring: Installed inside the building's walls, ceilings, or floors.
Depending on the installation method, wiring can be:
- Open Wiring: Mounted on wall surfaces or ceilings for easy access.
- Hidden Wiring: Placed inside walls or under flooring for a cleaner look.
Your choice between open and hidden wiring depends on the building’s construction type and your design preferences.
Wiring in Different Types of Buildings
The method of wiring installation varies based on the building's construction. The most common types are:
1. Panel Buildings
Panel buildings are made from reinforced concrete panels with pre-built channels for wiring. These channels simplify the installation process.
Wiring Tips for Panel Homes:
- Use existing channels for wiring wherever possible.
- Avoid creating new channels in load-bearing walls. This is restricted by building codes to prevent structural damage.
- If additional wiring is needed, lay cables under the floor or conceal them beneath a layer of plaster.
Important: Never cut horizontal grooves in panel seams or create deep channels in load-bearing walls.
2. Brick Homes
In brick buildings, wiring can be hidden under plaster or installed on the surface.
Wiring Tips for Brick Homes:
- When renovating, it’s easier to leave old wiring in place and add new circuits.
- The maximum depth for a wall channel is 25 mm (about 1 inch). The length should not exceed 3 meters (10 feet).
Prohibited: Cutting channels in ceilings or horizontal grooves in load-bearing walls is not allowed.
3. Monolithic Homes
Monolithic construction uses concrete with embedded steel reinforcement.
Wiring Tips for Monolithic Homes:
- Avoid damaging the steel reinforcement when cutting channels.
- Use open wiring for easier access, or hide cables under decorative panels or plaster.
Wiring in Private Homes
In private homes, external power connections are crucial. You can connect your home to the grid using:
- Self-supporting insulated wire (SIP)
- Cable secured on a steel wire
- Underground cable (at least 24 inches deep)
Pro Tip: For wooden homes, follow the same safety protocols as in other wood-frame structures to prevent fire hazards.
Choosing the Right Wires and Cables
Proper cable selection is critical for the safety and durability of your home’s electrical system. Consider the following factors:
Conductor Material
- Copper: Recommended for its lower resistance, higher strength, and resistance to corrosion.
- Aluminum: Cheaper but less durable and prone to oxidation. Avoid for permanent installations.
Cable Cross-Section (Gauge)
The cable’s gauge should match the expected electrical load. Use the table from electrical standards to determine the right size.- 1.5 mm² (16 AWG) for lighting circuits
- 2.5 mm² (14 AWG) for standard outlets
- 4 mm² (12 AWG) or higher for high-power equipment
Insulation Material
Choose flame-retardant cables, such as VVGng-LS, to reduce the risk of fire.
Pro Tip: Always leave a margin in the cable’s capacity to reduce heating and extend its lifespan.
Steps for Installing Home Electrical Wiring
Step 1: Create a Wiring Diagram
Plan the location of outlets, switches, light fixtures, and major appliances. This will help you avoid future adjustments and ensure proper coverage throughout your home.
Step 2: Select and Purchase Materials
Buy high-quality cables and protective devices. Prioritize safety features like circuit breakers and ground-fault protection devices.
Step 3: Install the Distribution Board
Mount the main distribution board near the entrance for easy access. Install circuit breakers and ground-fault protection devices to safeguard your wiring system.
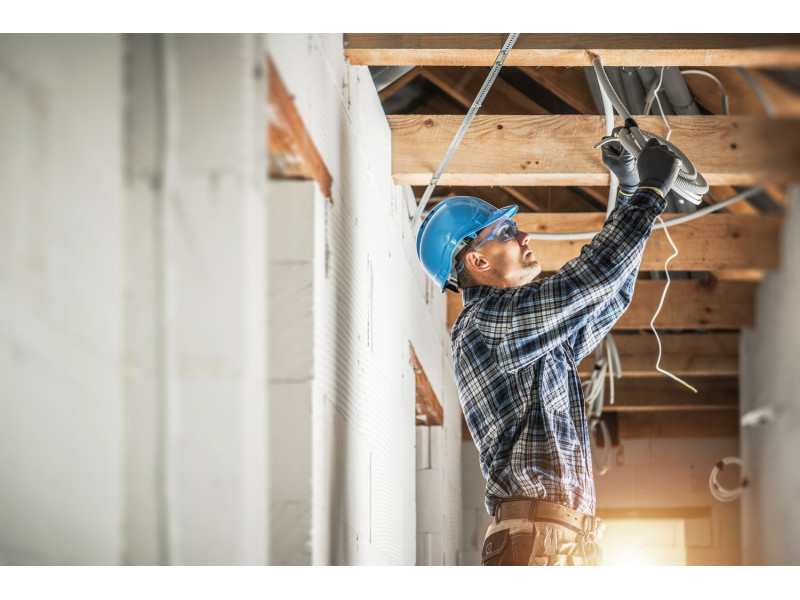
Step 4: Run the Wiring
Depending on your chosen method (open or hidden), route the cables through walls, ceilings, or conduits.
Open Wiring: Use plastic conduits or flexible tubing to protect the cables.
Hidden Wiring: Cut channels in the wall for cables and seal them with plaster.
Important: Avoid using wire twists. Use proper connectors for reliable and safe connections.
Safety Rules for Home Electrical Wiring
- Never exceed the rated capacity of cables or circuit breakers. This can lead to overheating and fire.
- Always install a ground-fault circuit interrupter (GFCI) in bathrooms, kitchens, and outdoor areas.
- Ensure proper grounding. Use a TN-C-S or TN-S grounding system for maximum protection.
- Test the wiring before covering it. Check for proper connections and insulation resistance.
Common Mistakes to Avoid
- Skipping Grounding: Always ensure proper grounding for safety.
- Incorrect Cable Sizing: Undersized cables can overheat and fail.
- Poor Connections: Avoid twisting wires; use terminal blocks or connectors.
- Ignoring Safety Codes: Follow local regulations to ensure compliance and safety.
Conclusion
Installing electrical wiring in a home requires careful planning and execution. By following best practices and choosing the right materials, you can ensure a safe and reliable electrical system.
If you’re unsure about any part of the process, consult a professional electrician. For high-quality cables, circuit breakers, and other electrical components, visit safsale.com.
Safety and quality should always come first