Automated lighting control systems have revolutionized the way we manage illumination in both residential and commercial environments. These systems offer enhanced convenience, energy efficiency, and improved safety by automating the control of lighting fixtures. This guide delves into the components, types, functionalities, and best practices for implementing automated lighting control systems, providing you with the knowledge to optimize your lighting setup effectively.
What Are Automated Lighting Control Systems?
An automated lighting control system is a collection of devices and technologies designed to manage the operation of indoor and outdoor lighting fixtures. These systems automate tasks such as turning lights on or off, adjusting brightness levels, and monitoring the status of lighting equipment. By integrating sensors, controllers, and communication protocols, automated lighting systems provide intelligent and responsive illumination tailored to specific needs and conditions.
Key Functions:
- Switching: Automatically turning lights on or off based on predefined conditions or user input.
- Dimming: Adjusting the brightness of light sources to create desired ambiance or conserve energy.
- Monitoring: Tracking the operational status of lighting fixtures and detecting faults or malfunctions.
Types of Control:
- Centralized Control: Managed from a single, centralized location, allowing for coordinated operation of multiple lighting zones.
- Local Control: Individual control points for specific lighting zones or fixtures, enabling localized adjustments.
Types of Automated Lighting Controls
1. Centralized Control Systems
Centralized control systems manage all lighting operations from a single hub or controller. These systems are ideal for large buildings, commercial spaces, or facilities where coordinated lighting management is essential.
Components:
- Central Controller: The main unit that processes inputs and sends commands to lighting fixtures.
- Sensors: Devices that detect environmental changes (e.g., motion, light levels) and communicate with the central controller.
- Actuators/Relays: Interfaces that receive commands from the controller to operate the lighting fixtures.
Advantages:
- Unified Management: Simplifies control by centralizing all operations.
- Scalability: Easily expandable to accommodate additional fixtures or zones.
- Integration: Can be integrated with other building management systems for comprehensive automation.
2. Local Control Systems
Local control systems operate individual lighting zones or fixtures independently. These systems are suitable for smaller spaces or areas requiring specific lighting configurations.
Components:
- Local Controllers: Dedicated units for managing specific lighting zones or fixtures.
- Sensors: Similar to centralized systems but operate independently for each zone.
- Dimmers/Switches: Devices that allow manual or automated adjustment of light levels.
Advantages:
- Flexibility: Allows for tailored lighting solutions for different areas.
- Simplicity: Easier to install and manage in smaller setups.
- Cost-Effective: Often less expensive than centralized systems for small-scale applications.
Local Control Components
1. Motion Sensors
Motion sensors are pivotal in automating lighting based on occupancy. They detect the presence or movement of individuals within a specific area and trigger lighting actions accordingly.
Types of Motion Sensors:
- Infrared (IR) Sensors: Detect body heat and movement using infrared technology.
- Microwave/Radar Sensors: Use microwave or radio waves to detect motion, offering longer range and penetration through obstacles.
How They Work:
- Detection: Sensors monitor their environment for movement or heat signatures.
- Signal Transmission: Upon detecting motion, sensors send a signal to a relay or controller.
- Action: The relay acts as a switch, turning the lights on or off based on the sensor's input.
Applications:
- Residential: Automatically turning on lights when entering a room.
- Commercial: Enhancing security by activating lights when unauthorized movement is detected.
- Industrial: Managing lighting in workspaces to conserve energy when areas are unoccupied.
2. Photoelectric Relays
Photoelectric relays control lighting based on ambient light levels. They ensure that artificial lighting complements natural daylight, enhancing energy efficiency.
Components:
- Light Sensor: Detects the intensity of natural light in the environment.
- Relay: Switches the lighting fixtures on or off based on the sensor's readings.
Applications:
- Outdoor Lighting: Automatically turning streetlights on at dusk and off at dawn.
- Commercial Buildings: Adjusting indoor lighting based on daylight availability to reduce energy consumption.
3. Dimmers
Dimmers provide adjustable brightness levels, allowing users to tailor the lighting intensity to their needs and preferences.
Types of Dimmers:
- Manual Dimmers: Controlled by switches or sliders.
- Automated Dimmers: Integrated with sensors and controllers for dynamic brightness adjustment.
Advantages:
- Energy Savings: Lower brightness levels consume less energy.
- Extended Bulb Lifespan: Reducing the load on bulbs can extend their operational life.
- Enhanced Ambiance: Creates desired lighting environments for various activities.
Compatibility:
- LED Lamps: Best suited for LED lighting due to their low heat output and compatibility with dimming technology.
- Traditional Bulbs: May require specific dimmers to function correctly without flickering or reduced lifespan.
The DALI Protocol (Digital Addressable Lighting Interface)
Overview
The DALI (Digital Addressable Lighting Interface) protocol is a standardized communication protocol used for digital lighting control. It enables two-way communication between lighting devices and controllers, facilitating advanced automation and control features.
Key Features:
- Addressability: Each lighting fixture can be individually addressed and controlled.
- Bi-Directional Communication: Allows controllers to send commands and receive status updates from lighting fixtures.
- Interoperability: Ensures compatibility between devices from different manufacturers adhering to the DALI standard.
- Scalability: Supports up to 64 individual devices per DALI segment, making it suitable for both small and large installations.
Components:
- DALI Controllers: Manage the overall lighting system, sending commands to fixtures.
- DALI Actuators: Interface devices that receive commands from controllers and execute them on lighting fixtures.
- DALI-Compatible Fixtures: Light sources that can communicate with DALI controllers and actuators.
Benefits:
- Flexibility: Easily reconfigure lighting setups without extensive rewiring.
- Advanced Control: Supports features like scene setting, dimming schedules, and energy monitoring.
- Efficiency: Enhances energy savings through precise control of lighting operations.
Applications:
- Commercial Buildings: Office lighting systems that adapt to occupancy and daylight.
- Industrial Facilities: Complex lighting setups requiring precise control and monitoring.
- Residential Smart Homes: Personalized lighting environments integrated with home automation systems.
Wiring Schemes and Organization for Automated Lighting Control Systems
Proper wiring is essential for the safety, efficiency, and functionality of automated lighting control systems. Below are key considerations and steps for organizing and wiring your lighting automation setup.
1. Planning the Wiring Layout
- Assess Lighting Zones: Identify distinct areas that require separate control, such as general lighting, task lighting, and security lighting.
- Create a Wiring Diagram: Sketch a detailed plan showing the placement of fixtures, switches, sensors, and controllers.
- Calculate Load: Ensure that the total wattage of all lighting fixtures does not exceed the capacity of the circuit breaker.
- Select Appropriate Wiring: Choose wires that can handle the electrical load and are suitable for the environment (e.g., moisture-resistant wires for outdoor lighting).
2. Installing Electrical Boxes and Conduit
- Mount Electrical Boxes: Install boxes for each light fixture, switch, and sensor at designated locations.
- Run Conduit: Use conduit to protect and route wires from the main power source to each fixture and control point.
- Ensure Compliance: Adhere to local electrical codes and standards during installation to ensure safety and legality.
3. Running and Connecting Wires
- Pull Wires Through Conduit: Use fish tape to guide wires through the conduit to each electrical box.
- Strip Wire Ends: Carefully remove insulation from the ends of the wires to prepare for connections.
- Connect Fixtures and Devices: Attach wires to lighting fixtures, switches, sensors, and controllers according to the wiring diagram.
- Secure Connections: Use wire nuts or other connectors to secure all connections and wrap with electrical tape for added safety.
4. Integrating Smart Controls and DALI Systems
- Install DALI Controllers: Position controllers in a central location for easy access and communication with all DALI-compatible fixtures.
- Connect Smart Devices: Integrate smart switches, dimmers, and sensors with the DALI system to enable advanced lighting control features.
- Test Communication: Ensure that all devices communicate effectively with the controller and respond to commands.
5. Testing and Troubleshooting
- Restore Power: Turn on the circuit breaker to supply power to the lighting system.
- Test Each Zone: Verify that each lighting zone responds correctly to controls and sensors.
- Check for Issues: Use a voltage tester to ensure all connections are secure and functioning properly.
- Adjust Settings: Fine-tune sensor sensitivity, dimming levels, and automation schedules as needed.
DIY Wiring for Automated Lighting Control Systems
Creating your own wiring setup for automated lighting control systems can be both cost-effective and rewarding. However, it requires careful planning and adherence to safety standards. Below are the steps and considerations for DIY wiring:
1. Materials and Tools Needed
Materials:
- Electrical Wires: Preferably copper for reliability.
- DALI Controllers and Actuators: For managing digital lighting control.
- Smart Switches and Dimmers: Compatible with your lighting fixtures.
- Light Fixtures: LED, fluorescent, or other DALI-compatible lamps.
- Electrical Boxes and Conduit: For housing connections and protecting wires.
- Relays and Connectors: For secure and safe electrical connections.
- Mounting Hardware: For installing fixtures, switches, and sensors.
Tools:
- Wire Strippers: For removing insulation from wires.
- Screwdrivers: For assembling fixtures and connecting switches.
- Drill with Bits: For creating holes for mounting fixtures and conduits.
- Voltage Tester: To ensure circuits are not live before working.
- Fish Tape: For guiding wires through conduits.
- Ladder: For accessing high or hard-to-reach areas.
2. Steps for DIY Wiring
Step 1: Planning and Layout
- Determine Lighting Zones: Identify areas that require separate control, such as general lighting, task areas, and security zones.
- Create a Wiring Diagram: Draft a detailed plan illustrating the placement of all components, including fixtures, switches, sensors, and controllers.
- Calculate Electrical Load: Ensure that the total wattage of all fixtures does not exceed the capacity of the circuit breaker.
Step 2: Installing Electrical Boxes and Conduit
- Mount Electrical Boxes: Securely install boxes where each fixture, switch, and sensor will be located.
- Run Conduit: Install conduit to protect and route wires from the main power source to each electrical box.
Step 3: Running Wires
- Pull Wires Through Conduit: Use fish tape to guide wires through the conduit to each electrical box.
- Strip Wires: Carefully remove insulation from the ends of the wires to prepare for connections.
Step 4: Connecting Fixtures and Devices
- Connect Light Fixtures: Attach wires to the lighting fixtures according to the wiring diagram.
- Install Switches and Dimmers: Wire switches and dimmers to control each lighting zone or fixture.
- Integrate Sensors: Connect motion sensors and photoelectric relays to their respective fixtures and controllers.
Step 5: Integrating the DALI System
- Connect DALI Controllers: Position DALI controllers centrally and connect them to all DALI-compatible fixtures.
- Test Communication: Ensure that each fixture responds correctly to the controller's commands.
Step 6: Testing the System
- Restore Power: Turn on the circuit breaker to supply electricity to the system.
- Test Each Component: Verify that all fixtures, switches, sensors, and controllers operate as intended.
- Troubleshoot Issues: Use a voltage tester to identify and resolve any connectivity or functionality problems.
3. Safety Considerations
- Turn Off Power: Always switch off the main power before starting any electrical work to prevent shocks.
- Use Proper Tools: Ensure all tools are rated for electrical work and are in good condition.
- Follow Electrical Codes: Adhere to local electrical codes and standards to ensure safe and compliant installations.
- Consider Professional Help: If unsure about any step, consult a licensed electrician to ensure safety and functionality.
Optimal Lighting Solutions for Garages
Achieving the best lighting setup in your garage involves combining different lighting types and strategic placement to meet various needs. Below are some optimal solutions:
1. General Overhead Lighting
- Configuration: Install multiple LED recessed fixtures evenly spaced across the ceiling.
- Purpose: Provides comprehensive illumination for the entire garage.
- Best Practices:
- High Lumen Output: Use fixtures with sufficient brightness to ensure clear visibility.
- Color Temperature: Choose a color temperature between 4000K-5000K for a crisp, white light that enhances visibility and reduces eye strain.
2. Task-Specific Lighting
2.1. Workbench Lighting
- Configuration: Mount LED strip lights or directional wall-mounted fixtures above the workbench.
- Purpose: Offers focused lighting for detailed tasks, minimizing shadows and enhancing precision.
- Best Practices:
- Positioning: Angle lights to reduce glare and avoid direct exposure to eyes.
- Brightness: Ensure adequate brightness without causing eye strain, typically using fixtures with high lumen output.
2.2. Storage Area Lighting
- Configuration: Install motion-sensor lights or LED spotlights in storage areas.
- Purpose: Enhances visibility in specific areas, making it easier to locate items and organize tools efficiently.
- Best Practices:
- Durability: Use fixtures resistant to dust and moisture to ensure longevity.
- Coverage: Position lights to cover the entire storage area without creating harsh shadows.
3. Emergency and Security Lighting
- Configuration: Incorporate battery-backed LED fixtures and motion-sensor lights.
- Purpose: Provides essential lighting during power outages and enhances security by deterring unauthorized access.
- Best Practices:
- Placement: Install emergency lights near exits and high-traffic areas.
- Backup Power: Ensure backup power sources are reliable and regularly maintained.
4. Smart Lighting Integration
- Configuration: Utilize smart switches, dimmers, and wireless controls.
- Purpose: Enhances convenience, allows for automated lighting schedules, and optimizes energy usage.
- Best Practices:
- Compatibility: Ensure smart devices are compatible with your existing lighting fixtures and control systems.
- Automation: Set up automated schedules or triggers based on occupancy, time of day, or external temperature conditions.
5. Protective Measures
- Configuration: Use protective covers or diffusers on light fixtures.
- Purpose: Prevents damage from dust, moisture, and accidental impacts, ensuring consistent light quality and extending fixture lifespan.
- Best Practices:
- IP Ratings: Choose fixtures with high IP ratings (e.g., IP65) for resistance to water and dust.
- Regular Maintenance: Clean and inspect fixtures regularly to maintain optimal performance.
Best Practices for Selecting and Installing Automated Lighting Control Systems
Implementing automated lighting control systems effectively requires careful planning and adherence to best practices. Here are key guidelines to ensure a successful installation:
1. Assess Lighting Needs
- Functionality: Determine the primary purpose of the lighting (e.g., ambient, task, security).
- Space Characteristics: Consider room size, layout, and existing architectural features.
- User Preferences: Take into account color temperature preferences and desired aesthetic outcomes.
2. Choose the Right Control Components
- Sensors: Select appropriate sensors (motion, light) based on the specific requirements of each lighting zone.
- Controllers: Opt for centralized or local controllers that best fit the scale and complexity of your lighting system.
- Dimmers and Switches: Ensure dimmers and switches are compatible with your lighting fixtures and offer the desired level of control.
3. Plan for Uniform Lighting
- Fixture Placement: Strategically position fixtures to ensure even light distribution and minimize shadows.
- Layered Lighting: Combine ambient, task, and accent lighting to achieve a balanced and versatile lighting environment.
4. Incorporate Smart Controls
- Dimmers and Sensors: Utilize dimmers and occupancy sensors to optimize energy usage and enhance user control.
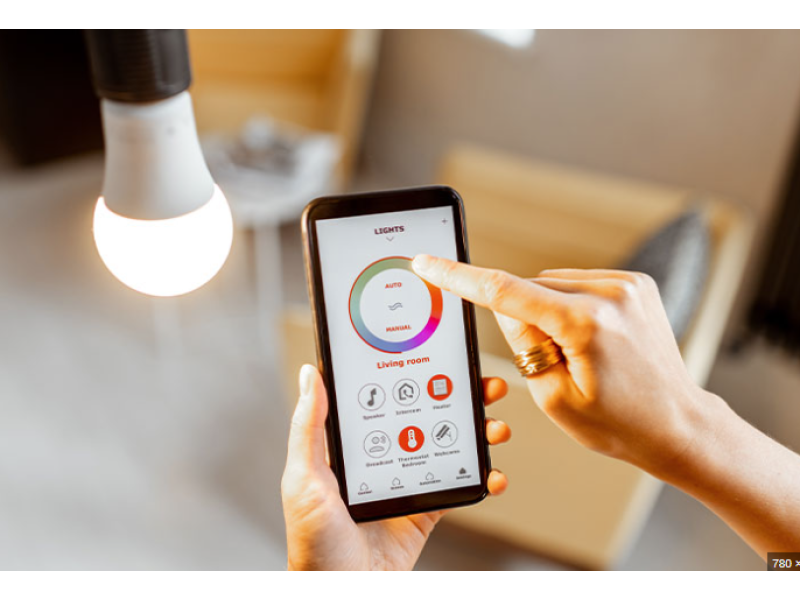
- Automated Systems: Integrate lighting systems with smart home technologies for remote management and automation.
5. Prioritize Safety and Compliance
- Electrical Standards: Ensure all lighting installations comply with local electrical codes and safety standards.
- Protective Measures: Implement safeguards against electrical faults, overloading, and exposure to hazardous materials.
6. Optimize for Energy Savings
- Energy-Efficient Fixtures: Choose fixtures that complement energy-efficient lamp types like LEDs.
- Insulation and Sealing: Improve room insulation to retain heat and reduce the overall lighting load.
7. Maintain and Upgrade Regularly
- Routine Inspections: Regularly inspect lighting systems for wear, damage, and performance issues.
- Upgrades: Stay informed about advancements in lighting technology to incorporate improvements that enhance efficiency and functionality.
Conclusion
Automated lighting control systems offer a sophisticated and efficient way to manage lighting in various settings, from residential garages to expansive commercial spaces. By understanding the different types of control systems, integrating smart technologies like the DALI protocol, and adhering to best practices in wiring and installation, you can create a lighting environment that is both functional and energy-efficient.
Implementing these systems not only enhances convenience and safety but also contributes to significant energy savings and extended lifespan of lighting fixtures. Whether you're upgrading an existing setup or planning a new installation, automated lighting control systems provide the flexibility and control needed to meet your specific lighting needs effectively.
Key Takeaways:
Choose Efficient Control Components: Select appropriate sensors, controllers, and dimmers to meet the specific lighting needs of each zone.
Implement Proper Wiring: Follow safety standards and best practices for wiring to ensure a secure and functional lighting automation system.
Incorporate Smart Controls: Utilize smart switches and sensors to automate lighting operations, enhancing convenience and energy efficiency.
Prioritize Safety: Ensure all fixtures are properly mounted and protected, and adhere to electrical codes to prevent hazards.
Optimize for Energy Savings: Use energy-efficient lighting options like LEDs and integrate automation to reduce electricity consumption.
Plan for Uniform Lighting: Strategically place fixtures and employ layered lighting to achieve balanced illumination across all areas.
Maintain Regularly: Conduct routine inspections and maintenance to ensure optimal performance and longevity of the lighting system.
Stay Updated on Technology: Keep abreast of the latest advancements in lighting and control technologies to continuously improve and upgrade your lighting solutions.
Balance Cost and Benefits: While automated systems may have higher initial costs, their long-term energy savings and enhanced functionality make them a worthwhile investment.
Enhance Aesthetics and Functionality: Choose lighting solutions that not only provide adequate illumination but also complement the aesthetic and functional aspects of your space.
For expert assistance in selecting and installing automated lighting control systems for garages, homes, and commercial spaces, ensuring compatibility with your property’s infrastructure, or accessing comprehensive project documentation, visit safsale.com. Our specialists are ready to help you create a reliable, efficient, and intelligent lighting environment tailored to your specific needs.
Important Notice on Standards
All referenced documents and standards in this guide are provided for informational purposes only and should not be used as official publications. For authoritative guidelines and legal requirements, always consult the official standards organizations or regulatory bodies.