How to Connect a Surveillance Camera to a Computer
Connecting a surveillance camera to a computer can be achieved through several methods, depending on the type of camera (IP or analog) and the intended purpose. This guide covers:
- Direct connections for IP cameras
- Router-based setups, including WiFi configurations
- Using a video recorder for analog cameras
- Special considerations for outdoor camera installations
Direct Connection for IP Cameras
Directly connecting an IP camera to a computer is straightforward but requires specific steps:
Steps to Connect
Cable Connection:
- Use an Ethernet cable (preferably a crossover cable if the computer does not support auto-sensing).
- Plug the cable into the camera and the computer’s Ethernet port.
Adjust Network Settings:
- Assign a static IP address on the computer matching the camera’s subnet.
- Example: If the camera’s default IP is
192.168.1.100, set the PC’s IP to192.168.1.101.
Access the Camera:
- Open a web browser.
- Enter the camera’s IP address to access its web interface.
Configuration:
- Log in with default credentials (often found in the manual or on the device).
- Change network settings, such as assigning a new IP address compatible with your local network.
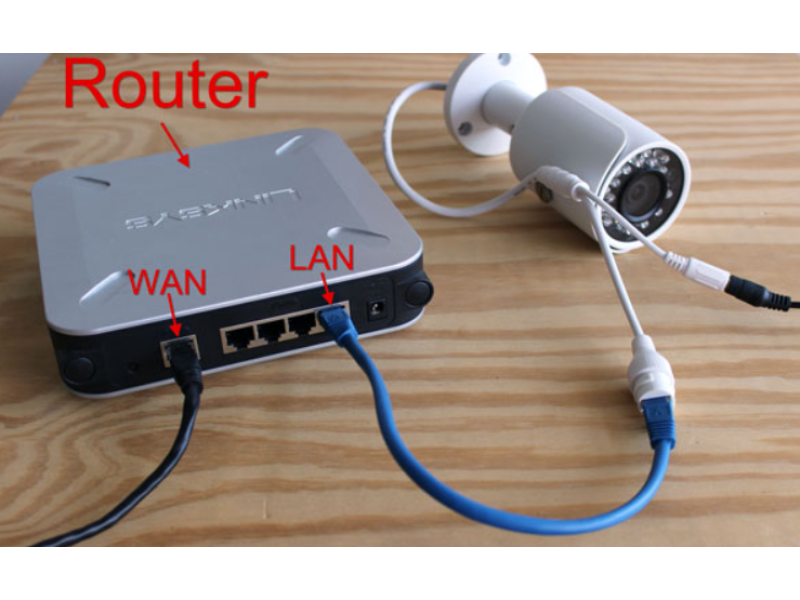
Connecting Through a Router
Steps for Wired Connection
Plug the Camera into the Router:
- Connect the camera to an available LAN port using an Ethernet cable.
Access Camera Settings:
- Use the router’s interface to find the camera’s assigned IP address (check DHCP client list).
Log Into the Camera:
- Access the camera through a web browser using its IP address.
Optional:
- Configure port forwarding on the router for remote access.
WiFi Camera Setup
Initial Setup:
- Temporarily connect the camera to the router using an Ethernet cable.
- Configure WiFi settings in the camera’s web interface.
Wireless Connection:
- Disconnect the Ethernet cable after configuring WiFi.
- Ensure the camera connects to the network.
Security:
- Set a strong WiFi password to prevent unauthorized access.
Connecting an Analog Camera to a Computer
Using a Video Capture Card
Install a Capture Card:
- Insert the card into a free PCI or PCIe slot on the motherboard.
- Connect the camera using a BNC connector.
Install Software:
- Use the software provided with the card to access the camera feed.
Monitor and Record:
- Configure the software for live viewing or recording.
Using a USB Adapter
Plug in the Adapter:
- Connect the camera to the USB video adapter using the BNC connector.
Install Drivers:
- Install any required drivers or software for the adapter.
Access Video Feed:
- Open the software to view the camera feed.
Outdoor Camera Considerations
Wired Connections
- Use shielded cables (e.g., shielded Ethernet or coaxial) to minimize interference.
- Install cables in UV-resistant conduit for protection against the elements.
WiFi Connections
- Ensure a strong WiFi signal at the installation site.
- Use an external antenna or signal booster if necessary.
Power Supply and Protection
- Protect cameras and equipment with lightning arresters or surge protectors.
- Use PoE (Power over Ethernet) for easier cable management.
Conclusion
Connecting a surveillance camera to a computer can be tailored to your specific setup, whether using IP or analog cameras, direct or router connections, or considering the needs of outdoor installations. With proper configuration, you can ensure seamless integration and reliable performance.