How to Set Up an IP Security Camera
IP cameras offer superior performance and advanced features for modern surveillance systems. This guide outlines step-by-step instructions for setting up IP cameras via router, internet, and WiFi.
1. Preparing for IP Camera Setup
What You Need:
- IP Camera: Ensure it supports your desired features (e.g., PoE, wireless).
- Router or Switch: Required for connecting multiple cameras.
- Cables: Ethernet cables (for wired connections).
- Power Supply: Ensure compatibility with the camera.
- Computer or Mobile Device: For initial setup and configuration.
Understand IP Addresses:
- Static IP: Ensures a fixed address for uninterrupted remote access.
- Dynamic IP: Changes over time; use a service like DynDNS or cloud-based solutions for remote viewing.
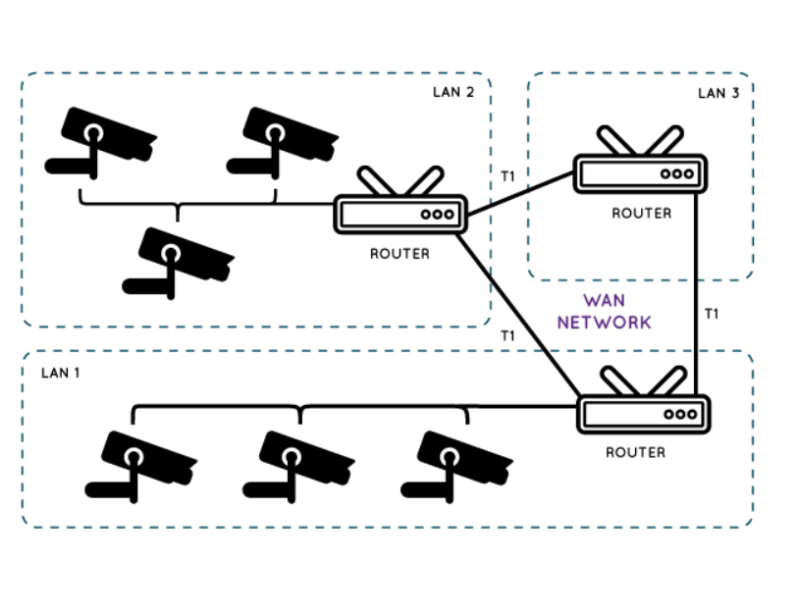
2. Setting Up IP Cameras Through a Router
Steps:
Connect the Camera to the Router:
Use an Ethernet cable for a stable connection.Access the Camera’s Interface:
- Check the default IP address (found in the camera’s manual).
- Enter the IP address into a browser to access the settings page.
Configure IP Settings:
- Assign a static IP address within your local network range.
- Set the subnet mask and gateway (router’s IP address).
Set Up Port Forwarding:
- Access your router’s settings.
- Go to Virtual Servers or Port Forwarding and assign a unique port to the camera.
- Save the settings.
Test the Connection:
Enter the router's IP address and the assigned port in a browser to check the live feed.
3. Configuring IP Cameras for Internet Access
Requirements:
- Static public IP or a dynamic DNS service.
- Configured router with port forwarding.
Steps:
- Set up the camera with a static local IP.
- Configure port forwarding in the router for external access.
- Use the public IP address or DNS service to access the camera remotely.
Pro Tip: For dynamic IPs, register with DynDNS or use a cloud-based service like Ivideon for seamless access.
4. Setting Up WiFi Cameras
Steps:
Initial Connection:
Connect the camera to your router using an Ethernet cable.Configure WiFi Settings:
- Log in to the camera’s settings.
- Search for your WiFi network (SSID) and enter the password.
Assign a Static IP:
- Avoid IP conflicts by assigning a unique address.
- Save the settings and disconnect the Ethernet cable.
Test the Connection:
- Ensure the camera appears in the router’s connected devices.
- Verify the live feed via the camera’s app or web interface.
Troubleshooting WiFi Issues:
- Use WiFi extenders if the signal is weak.
- Ensure compatibility with the router’s frequency (2.4 GHz or 5 GHz).
5. Using Cloud Services for IP Cameras
Cloud-based solutions simplify remote access without static IPs or port forwarding. Popular services include:
- Ivideon
- NOVIcloud
- Hik-Connect
Steps:
- Register on the cloud service provider’s platform.
- Add the camera by scanning its QR code or entering its serial number.
- Access live feeds and archives via mobile apps or browsers.
6. Common Issues and Fixes
- IP Address Conflicts: Ensure each device has a unique IP.
- No Live Feed: Verify network settings, cables, and power connections.
- Unstable WiFi Connection: Improve coverage with a stronger router or WiFi extender.
7. Recommended IP Camera Brands
For reliable performance, consider reputable brands:
- Axis
- Hikvision
- Dahua
- TP-Link
- Geovision
Conclusion
Configuring IP cameras requires careful attention to network settings, hardware compatibility, and security features. Whether connecting via router, WiFi, or cloud services, following these steps ensures a smooth and secure setup for your surveillance system.