Dome Camera Mounting Guide
Proper installation of dome cameras ensures optimal surveillance coverage and durability. Whether you’re mounting on walls, ceilings, or poles, follow these steps to ensure a secure and functional setup.
1. Preparing for Installation
Structural Stability
Ensure the mounting surface is sturdy enough to avoid vibrations, as even minimal shaking can cause blurry or distorted images.
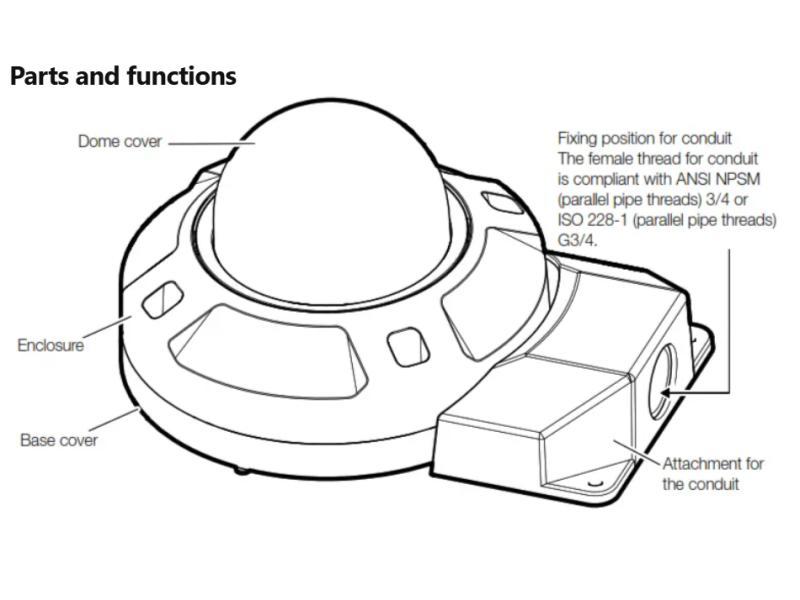
Access to Mounting Points
Dome cameras feature mounting holes on their base, which are usually concealed under the dome cover.
- Remove the dome cover to access these mounting points.
- In some models, you may need to detach the internal camera module or plate temporarily.
2. Mounting on Ceilings
Dome cameras are designed primarily for horizontal surfaces, making ceiling mounting straightforward.
Steps for Ceiling Installation:
- Remove the dome cover and align the mounting base with the desired position.
- Mark and drill holes for screws.
- Secure the base to the ceiling using appropriate screws and anchors.
- Route cables through the ceiling or cable entry points for a clean finish.
- Reattach the dome cover and adjust the camera angle.
Adjustment Ranges:
- Horizontal Adjustment: Full 360° rotation for precise alignment.
- Vertical Adjustment: Up to 180° for optimal field of view.
3. Wall Mounting
While dome cameras are primarily ceiling-mounted, wall installation is possible with adjustments to the field of view.
Steps for Wall Installation:
- Use the same process as ceiling mounting but adjust the camera's vertical angle during setup.
- Keep in mind that horizontal adjustment will be limited to the camera’s built-in field of view.
Considerations:
Wall-mounted dome cameras may have reduced coverage compared to ceiling-mounted setups due to their fixed vertical angle.
4. Mounting on Poles
Dome cameras can be mounted on poles with additional hardware.
Steps for Pole Installation:
- Use a mounting bracket or custom adapter to secure the camera to the cylindrical surface.
- Add rubber washers or shims to create a flat mounting surface and reduce mechanical stress on the camera housing.
- Ensure the pole is stable and free from excessive movement.
Safety Note:
When mounting cameras on poles carrying electrical lines or lights, adhere to local electrical safety regulations and maintain separation between power and low-voltage cables.
5. Key Tips for Outdoor Installations
- Use weather-resistant dome cameras with proper IP ratings for outdoor use.
- Position cameras in locations that minimize exposure to direct sunlight or harsh weather.
- Ensure that all cables are properly insulated and routed to prevent water ingress.
Conclusion
Mounting a dome camera securely on ceilings, walls, or poles is straightforward when following these steps. By selecting the right location and using proper installation techniques, you can ensure effective and reliable surveillance coverage.